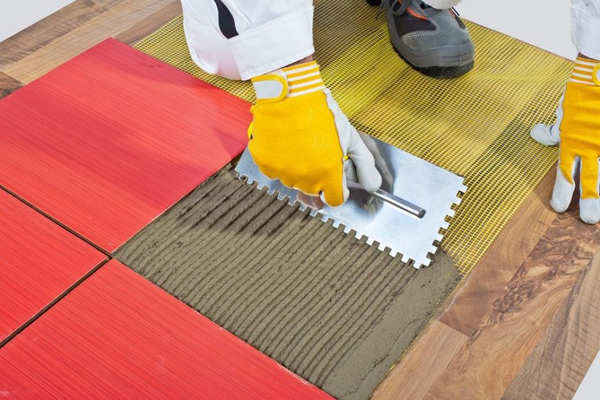
Wooden Floor
Wooden Floor – Old hardwood floors and wooden subfloors are both surfaces that homeowners may like to cover with tile. Provided that both are in good condition and level, it is possible to tile over them by first screwing down cement backerboard to create a smooth, level surface for the tiles to rest on. Tiling directly onto wood is not recommended, because it can swell and shrink during humidity, which can cause the tiles to crack or come loose.
1
Lay down 1/2-inch thick cement backerboard over the wood subfloor or hardwood. Cut the backerboard to fit the edges of the room with a carbide tipped scoring tool. Score the surface of the board where you want the cut, then snap the board along the score line. Screw the backerboard down to the wood with non-corrosive screws every 6 inches.
2
Apply fiberglass tape to each seam in the backerboard to cover it. Trowel on a thin layer of thinset mortar over the fiberglass to reinforce it, and let the mortar dry overnight.
3
Measure the wall furthest from the door you enter the room by and locate its center point. Snap a chalk line across the room from this point.
4
Dry fit your tiles onto the floor without mortar to determine the best layout for the room. Set the first tile on against the wall furthest from the door with the chalk line bisecting it. Set the next tiles evenly out to each side. This will give you a balanced installation with the cut tiles lining the edges of the room where they are least likely to be seen as you enter the room. Use tile spacers if necessary to keep your lines straight.
5
Cut any tiles to fit the space on a tile wet saw, and double check their fit in the dry layout. Take up the tiles from the floor in the opposite order you laid them down, and stack them nearby.
6
Spread thinset mortar onto the floor with a trowel. Spread the thinset with the flat edge of the trowel, then turn it to the teeth edge to comb the mortar until it is a uniform thickness.
7
Press the tiles into the mortar in the same pattern you determined in the dry fit. Tap the tiles into the mortar with a rubber mallet to get a good bond between the tiles and the mortar. Keep laying the tiles until you work yourself backwards out of the room. Let the tiles dry for 24 hours before walking on them.
8
Grout the installation by spreading grout over the tiles with a grout float. Direct the grout across the tiles with the float held at a 45-degree angle. Press the grout into the joints from multiple angles, then scrape away any excess grout with the side of the float. Let the grout dry for 10 minutes.
9
Clean the surface of the tiles with a damp grout sponge. Work the sponge in circles over the tiles, rinsing it frequently until the tiles are clean. Let the grout dry for 24 hours.
Things You Will Need
- Cement backerboard
- Carbide tipped scoring tool
- Non-corrosive screws
- Drill with screwdriver attachment
- Fiberglass tape
- Thinset mortar
- Trowel
- Measuring tape
- Chalk
- Tile wet saw
- Rubber mallet
- Grout
- Grout float
- Grout sponge


